
Maintainable ASP.Net MVC - Part 1
Setting up coded UI test on ASP.NET MVC using Selenium
I’m doing a series of posts on developing a maintainable ASP.NET MVC website. In this first post we’ll be looking at setting up a basic website and using Selenium to create coded UI tests. These tests will be the driver for the implementation we’ll be creating in the next posts.
The case
The website that we’ll creating will let us manage our monthly spendings. The user will be able to add expenses and get an overview of them per month.
A simple case, but enough to demonstrate the set-up we’ll create.
The code
You can find the sample code on my github repository.
Creating the project
Fire up your Visual Studio (I’m using VS2013 R3) and create a new project. Select ASP.NET Web Application and name the solution BudgetMeter and the project BudgetMeter.Web.
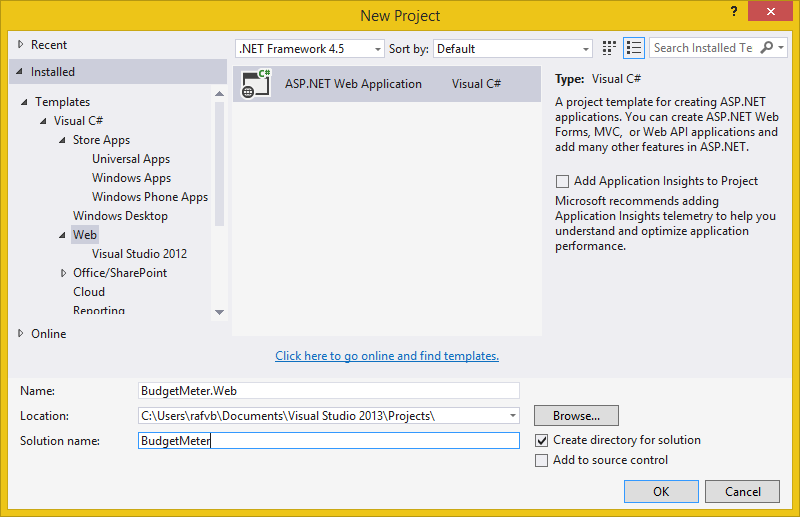
In the next screen, select the MVC template and also check the core references for Web API. We won’t use any authentication, so click Change Authentication and select No Authentication.

Press F5 and you should see a browser window with the default ASP.Net template. Note the address, especially the port number.
We have now created a neat little playground for us to mess up :)
Add the coded ui tests project
Now we will create our first coded UI test, but we will put them into a seperate project. Add a new Unit Test Project to the solution and name it BudgetMeter.CodedUITests.

Why no Coded UI Test project type?
We will not be using the Coded UI tools provided by Visual Studio. Using Selenium directly is easy (in my opinion even easier than the coded ui tools). Plus if we structure them correctly, we can get much cleaner and maintainable testing code.
Next we’ll add Selenium into the test project.
Adding Selenium
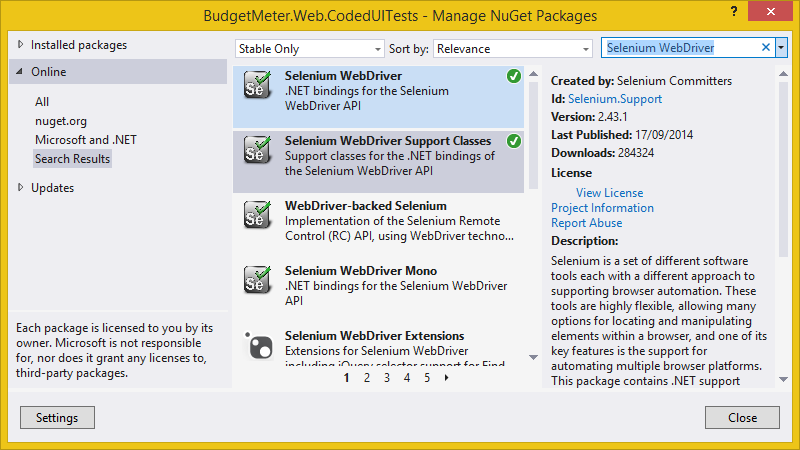
Richt click on the coded ui project and select Manage NuGet Packages. Search for Selenium WebDriver. Install the Selenium WebDriver (contains the actual web driver) and Selenium WebDriver Support Classes (helps us select elements on the page, wait for things to load, …) packages.
To start off we will do our tests in Internet Explorer. Chrome and Firefox work out of the box, and in the next posts I’ll show you how you can also go ‘headless’, but IE requires an extra step to work. We’ll get to that step in a moment.
Let’s write our first test now!
Our first test
In the test project rename UnitTest1.cs to HomePageTests.cs. Also rename the class itselve.
The first test we’ll do is to just check the title of the home page. We want it to display BugetMeter - Home.
So rename TestMethod1 to HasCorrectTitle to reflect what we are testing.
To spin up a browser and have selenium interact with it, we have to create the appropriate Web Driver. For IE this is the InternetExplorerDriver.
Add a using to OpenQA.Selenium.IE and add the following line to the test method:
var driver = new InternetExplorerDriver();Thats all we need to do to make the Web Driver launch a new browser window and interact with it. (If you wat to use Chrome or Firefox, just replace this with ChromeDriver or FirefoxDriver)
Lets navigate it to our home page!
Add the following line to get to the correct page:
driver.Navigate().GoToUrl("http://localhost:50765/");Note that the port number may be different. You can find it by going to the properties of the BudgetMeter.Web project and selecting the Web tab. There you should find the correct Project URL.
This will navigate to our home page, but we still have to do something there.
To check if the title is correct, add the following line:
Assert.AreEqual("BudgetMeter - Home", driver.Title);Driver.title will return the title of the current page it has open, so we can use that to verify that it matches what we expect.
Finally we want to close the Web Driver, so that our browser window also closes:
driver.Quit();The test method should look like this now:
[TestMethod]
public void HasCorrectTitle()
{
	var driver = new InternetExplorerDriver();

	driver.Navigate().GoToUrl("http://localhost:50765/");

	Assert.AreEqual("BudgetMeter - Home", driver.Title);

	driver.Quit();
}
Making it fail
To run our test, we first have to make sure that our website is running. Press Ctrl-F5 to start it without debugging.
Next run the test by placing the cursor in the test and pressing Ctrl-R, T.
And, behold!
…
Nothing happens.
No browser window pops open and the test failed. Don’t panic, this is completely normal :)
As mentioned before, IE requires an extra step to work.
Getting IE to work
If you read the reason why the test failed in its results, it tells you you need the Internet Explorer Driver Server. You can get it from here: http://www.seleniumhq.org/download/
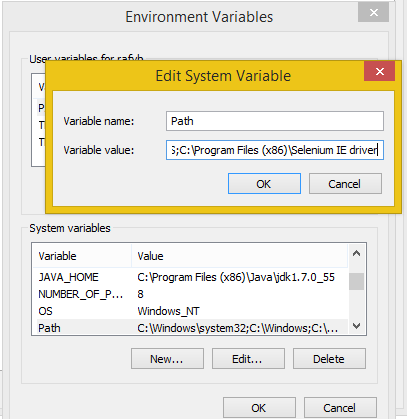
Download the 32 bit verion! We experienced performance issues with the 64 bit version, so I recommend 32 bit.
Unzip and place the executable somewhere. Next, make sure you place it’s folder on the systems path variable, so Selenium can use it.
If you run the test again, IE should pop open and navigate to our home page!
Fixing the failing test
We now have a test that fails for the correct reason:
Assert.AreEqual failed. Expected:<BudgetMeter - Home>. Actual:<Home Page - My ASP.NET Application>.
Notice however that the browser window remains open. Because the Assert.AreEqual method throws an exception when it fails, the Quit method is never called. We’ll fix this in the next posts.
Now lets get that test green!
Open up the Layout.cshtml file under Views\Shared and alter the
<title>BudgetMeter - @ViewBag.Title</title>Now open up the Index.cshtml file under Views\Home and change the title of the page by altering the line at the top:
ViewBag.Title = "Home";Build the project, make sure it’s still running (if you haven’t closed IIS Express it should still be running, else just Ctrl-F5) and run the test again.
Bask in the glory of your green test!
What’s next
We now have Selenium set up and can add functionality, driven through UI tests. In the next post, we’ll add some more tests, but bump into maintainability issues.
Looking at the test we have written, there are alot of bad practices in there. We’ve mixed the web driver into our tests, there is no configuration for our url, we’re not closing the driver when asserts fail, …
What’s even worse is that there will be lots of code duplication in our tests if we keep on writing them this way. They will become a maintenance hell and eventually not be maintained or even deleted.
So in the next post we’ll clean this up and make sure our tests stay in shape. We’ll strip Selenium from the tests themeselves and make sure they only describe the funcitonal requirements, removing all the technical details.
Stay tuned!
Feedback
If you are following along and run into problems or have questions, you can post them in the comments. If you are eagerly waiting for the next lessen, put some pressure on me to get them finished by posting it in the comments ;)